
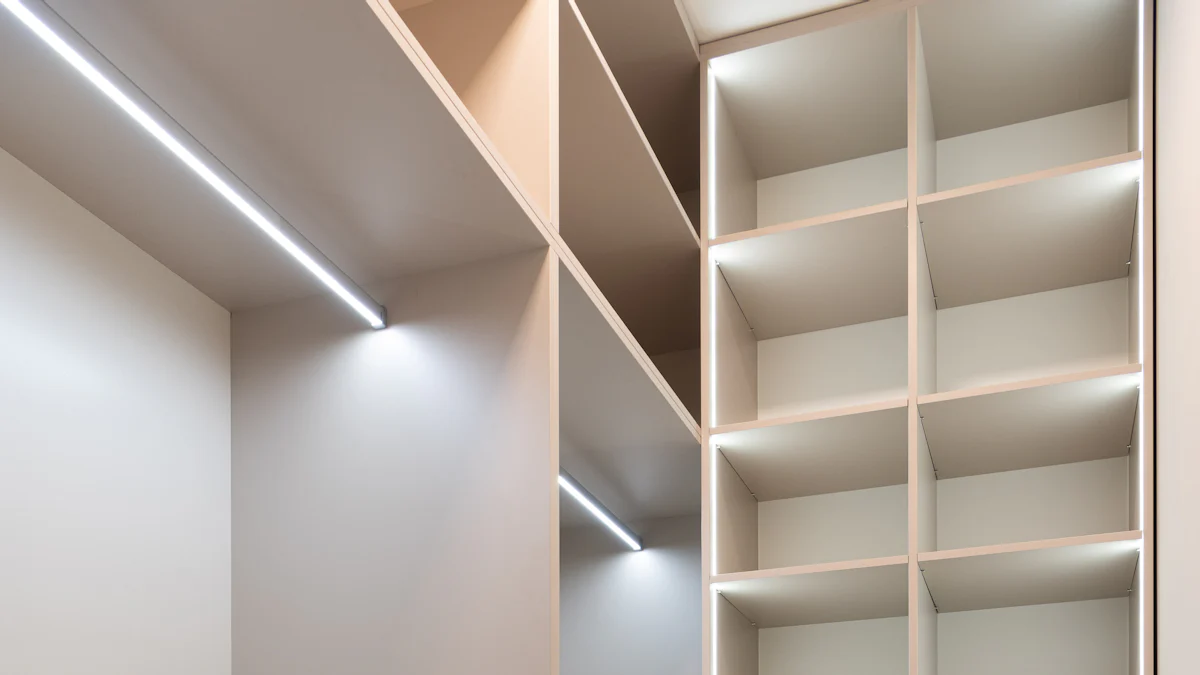
Embark on a journey to illuminate your closet with LED Magnetic lights connected seamlessly with a magnet switch. Discover the transformative power of efficient lighting as we delve into the realm of modern technology. Unveil the hidden potential of your space, embracing the brilliance and cost-saving benefits of LED lights. Explore how a simple yet ingenious magnet switch can revolutionize your closet experience, offering convenience at your fingertips.
To connect closet LED lights, you can attach the strips in parallel, all connected to the same point at the dimmer. When connecting LED strip lights in a closet, the last step is to connect the strip with the controller through the connector and then plug in the connector to turn on the LED strip lights. For automatic closet LED lights, the wiring involves steps like electricity connection, lights installation, switch placement, wiring, and LED strip placement. To install LED strip lights in a closet, you need to connect the lights by isolating the electrical wires inside each LED light, separating them if necessary, and removing about 3/4 of an inch of wire. When connecting LED lights to a motion sensor for a DIY battery-operated closet light, start by connecting the battery pack to the motion sensor using a flat-head screwdriver to lift the terminals and connect the wires accordingly. To add automatic lighting to a closet, you can use wire nuts and add a spare piece of wire to serve as a connection to the switch for a convenient setup. When connecting LED lights to a power supply, identify the input and output terminals on the power supply where the input terminals connect to the mains power and the output terminals connect to the LED strip lights. To pair LED lights together, you can use strip connectors such as clip-on or fold-over connectors depending on the type of strip lights you are connecting. When designing wardrobe lighting with LED strip lights, consider using battery-operated lights for areas that are difficult to wire and LED strip lights for a more versatile lighting solution. For safety and code compliance, ensure there is a minimum distance between LED light fixtures and any items stored in the closet, with specific distances required for different types of fixtures.
Materials Needed

List of Materials
LED light strips
- LED Lighting Fixtures: A safer alternative to traditional lighting options, containing zero hazardous materials and lasting longer than incandescent bulbs and CFLs.
- LED Lighting: Provides the same brightness as traditional bulbs but uses 90% less energy, lasts 15 times longer, and produces very little heat.
- Industrial LED Lighting Fixtures: Safer alternative to traditional fixtures, lasting 3 times longer than HPS fixtures, emitting no hazardous materials, and providing better color rendering for improved safety in industrial settings.
Magnet switch
- Magnet Switch: An essential component that allows you to control the LED lights with ease and convenience. It simplifies the process of turning the lights on and off without the need for physical contact.
Power source (batteries or adapter)
- Power Source Options: Choose between batteries for a wireless setup or an adapter for continuous power supply. Opt for energy-efficient solutions to maximize the benefits of LED lighting.
Wires and connectors
- Wires and Connectors: Necessary for establishing connections between the LED strips, magnet switch, and power source. Ensure proper insulation and secure connections for safe operation.
Mounting hardware (screws, adhesive tape)
- Mounting Hardware: Includes screws for a permanent fixture or adhesive tape for a hassle-free installation. Select the appropriate hardware based on your closet’s design and material.
Tools (screwdriver, wire cutter, etc.)
- Essential Tools: Prepare a screwdriver for mounting components, a wire cutter for precise adjustments, and any additional tools required for a smooth installation process.
Where to Purchase Materials
Online stores
- Explore online platforms offering a wide range of LED light strips, magnet switches, power sources, wires, connectors, mounting hardware, and tools. Check customer reviews for quality assurance before making a purchase.
Local hardware stores
- Visit local hardware stores specializing in electrical supplies to acquire all necessary materials conveniently. Seek expert advice from store professionals regarding specific requirements for your closet LED lighting project.
Preparing for Installation
Planning the Layout
Measuring the closet space
- Measure the dimensions of your closet space accurately to ensure the LED light strips fit perfectly. Precision in measurement is crucial for a seamless installation process.
Deciding the placement of LED strips and switch
- Strategically plan where to position the LED light strips and magnet switch within your closet. Consider accessibility and optimal lighting distribution for an efficient setup.
Safety Precautions
Ensuring power is off
- Before commencing any installation tasks, make sure to turn off the power source to prevent any electrical mishaps. Safety should always be a top priority when working with lighting fixtures.
Handling electrical components safely
- Handle all electrical components with care and caution. Avoid direct contact with live wires and ensure proper insulation of connections to minimize risks during the installation process. Remember, safety first!
Step-by-Step Installation Guide
Installing the LED Strips
Cutting the LED strips to size
Begin by measuring the required length of LED light strips using a ruler for precision. Mark the cutting points carefully to ensure a clean and accurate cut. Utilize sharp scissors or a cutting tool designed for LED strips to avoid damaging the lights.
Attaching the strips to the closet
Position the cut LED strips along the designated areas inside your closet. Peel off the adhesive backing and press firmly to secure them in place. Ensure even spacing between each strip for uniform lighting distribution throughout your closet space.
Wiring the LED Strips
Connecting the strips to the power source
Identify the positive and negative terminals on both the LED strips and power source. Use wire connectors to join these components, ensuring a tight connection. Double-check all connections to prevent any loose wiring that could affect the functionality of your LED lights.
Securing the wires
Neatly organize and secure any excess wiring behind or underneath shelves within your closet. Use cable clips or ties to bundle wires together, preventing tangling or interference with other items stored in your closet. Keeping wires tidy not only enhances safety but also maintains a clean aesthetic for your lighting setup.
Installing the Magnet Switch
Positioning the magnet and switch
Select an easily accessible spot within your closet to mount both the magnet and switch components. Ensure they are within close proximity for seamless operation. The magnet should align perfectly with the switch when in its resting position, allowing for effortless activation of your LED lights.
Connecting the switch to the LED circuit
Identify where you want to place your magnet switch in relation to your LED light strips. Carefully connect one end of each wire from the switch to their corresponding terminals on the LED circuit. Secure these connections with electrical tape or wire nuts for added stability and safety during use.
Testing the Setup
Turning on the power
- Flip the switch on your power source to activate the flow of electricity to your newly installed LED lights.
- Listen for a subtle hum as the lights come to life, illuminating your closet with a gentle glow that enhances visibility.
Checking the functionality of the magnet switch
- Wave your hand near the magnet switch to trigger its response and witness the LED lights turning on instantly.
- Marvel at the seamless operation of the magnet switch, allowing you to control your closet lighting effortlessly with a simple touch.
Troubleshooting Common Issues
LED Lights Not Turning On
Checking connections
- Inspect the connection points between the LED light strips, power source, and any connectors to ensure they are securely fastened.
- Verify that there are no loose wires or exposed conductors that could disrupt the electrical flow to the lights.
- Reposition any components if necessary to establish a more stable connection and restore functionality to your LED lights.
Ensuring power source is working
- Confirm that the power source, whether batteries or an adapter, is functioning correctly by testing it with another device.
- Replace the batteries or adapter if they are depleted or faulty to provide a consistent power supply for your LED lights.
- Check for any tripped circuit breakers or blown fuses that may be interrupting the electricity flow to your closet lighting system.
Magnet Switch Not Working
Adjusting the position of the magnet
- Reposition the magnet switch within close proximity to its corresponding magnet to ensure proper alignment for activation.
- Test different locations within your closet to find the optimal placement that triggers the switch reliably every time.
- Avoid obstructions or interference near the magnet switch that could hinder its operation and responsiveness.
Inspecting the switch for damage
- Examine the magnet switch for any visible signs of physical damage such as cracks, loose components, or misalignment.
- Cleanse any dirt or debris accumulated around the switch that might impede its functionality and responsiveness.
- Consider replacing the magnet switch if all attempts at troubleshooting fail to restore its proper operation and connection with your LED lights.
As you conclude your closet LED lighting project, reflect on the meticulous installation journey you’ve embarked on. Embrace the brilliance of LED Magnetic lights and the convenience of a magnet switch, transforming your closet into a beacon of efficient illumination. With motion-activated lighting testimonies echoing convenience and energy savings, envision a future where light responds to your presence effortlessly. Explore the endless possibilities of DIY projects and let your creativity illuminate every corner of your living space
Post time: Jun-24-2024