
When it comes to installing a junction box for your flood light, proper installation is crucial for safety and functionality. Understanding the process and having the right tools and materials at hand are key to a successful installation. Before you begin, ensure you have a ladder, electric screwdriver or drill, wire cutters, wire strippers, electrical tape, wire connectors, voltage tester, junction box, floodlight fixture, light bulbs, and mounting hardware ready. These tools are essential for a smooth install junction box experience.
Preparing for Installation
Gathering Tools and Materials
List of necessary tools
- Ladder
- Electric screwdriver or drill
- Wire cutters and wire strippers
- Electrical tape
- Wire connectors
- Voltage tester
List of required materials
- Junction box
- Floodlight fixture
- Light bulbs
- Mounting hardware
Ensuring Safety
Turning off power
To begin the installation process, switch off the power to the designated area to prevent any electrical mishaps during the setup.
Using safety gear
Prioritize your safety by wearing appropriate protective gear such as gloves and goggles to shield yourself from potential hazards.
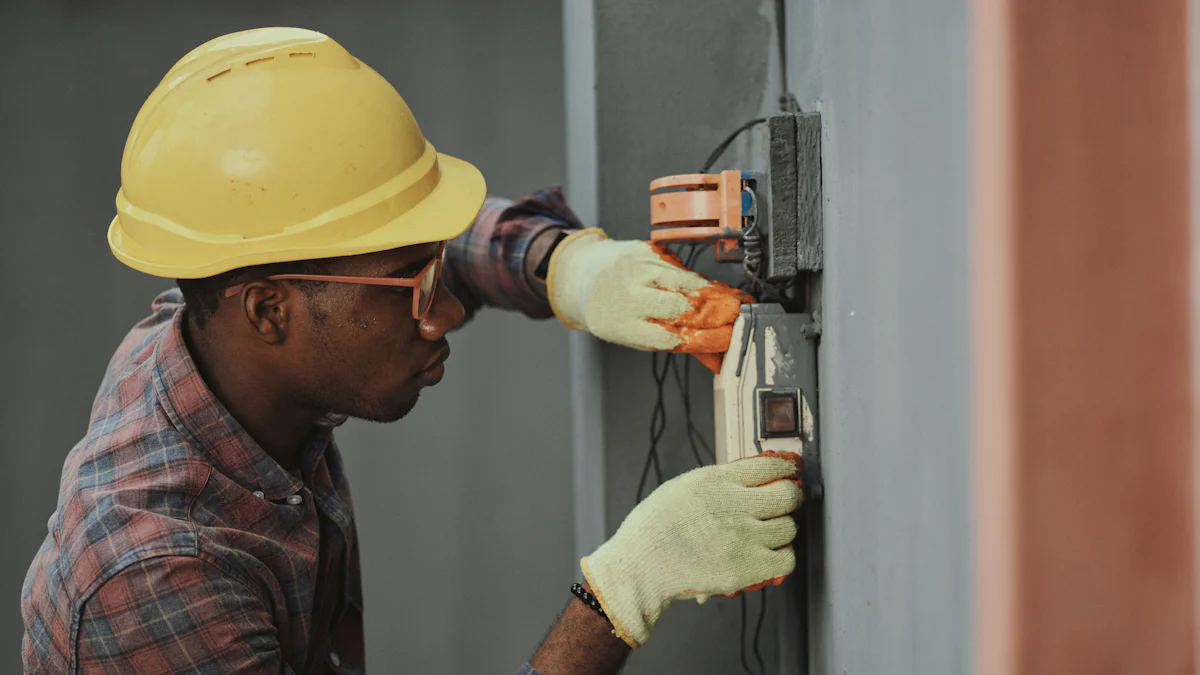
Installing the Junction Box
Choosing the Location
When installing a junction box, it is crucial to select the optimal location to ensure proper functionality and safety. Consider expert advice on choosing the best spot for your junction box installation.
Factors to consider
- Evaluate the proximity to the floodlight fixture for efficient wiring.
- Ensure easy access for maintenance and future inspections.
Marking the spot
- Use a pencil or marker to mark the chosen location accurately on the wall.
- Double-check alignment and height for precise placement.
Mounting the Junction Box
Properly mounting the junction box is essential for a secure and stable installation process.
Drilling holes
- Use an electric screwdriver or drill to create holes according to the marked spots.
- Ensure the holes are aligned with precision for seamless mounting.
Securing the box
- Align the junction box with the drilled holes.
- Securely fasten screws through the designated openings in the box.
Installing cable clamps
- Attach cable clamps inside the junction box to secure incoming wires effectively.
- Ensure each wire is properly clamped to prevent any loose connections.
Wiring the Junction Box
Running the Wires
To begin running the wires for your junction box, utilize fish tape to guide the electrical wires from the box to the floodlight location. This method ensures a smooth and efficient wiring process without any tangling or interference. Remember to connect each wire from the floodlight fixture to its corresponding counterpart in the junction box. Match black wires with black, white with white, and green or copper wires together for proper electrical connections.
Measuring wire length
- Measure the required length of wires accurately using a measuring tape or ruler.
- Add a few extra inches to accommodate any adjustments during installation.
- Cut the wires precisely to avoid excess lengths that can lead to clutter inside the junction box.
Stripping the wires
- Strip off insulation from both ends of the wires using a wire stripper tool.
- Ensure that only the necessary amount of insulation is removed to expose enough wire for connection.
- Double-check for any exposed copper strands that may cause short circuits.
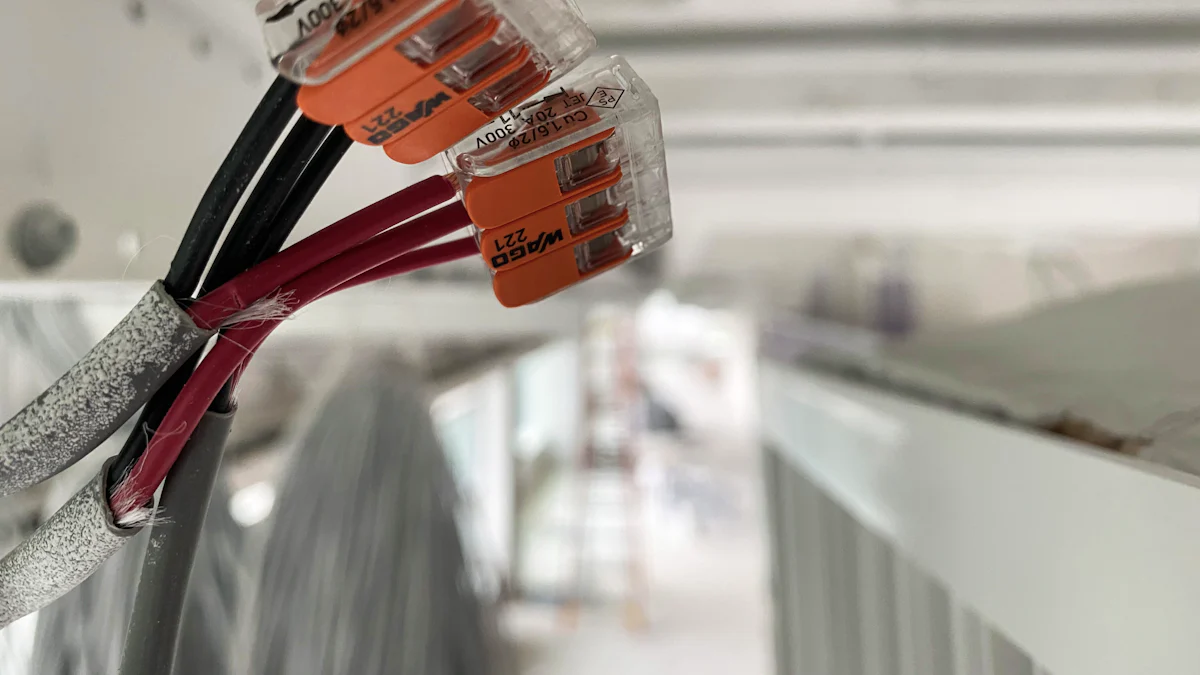
Connecting the Wires
When connecting the wires in your junction box, focus on secure and proper linkages between fixtures and cables. Use wire connectors to join corresponding wires together within the box, maintaining a reliable electrical circuit throughout.
Matching wire colors
- Identify and match wires based on their colors for accurate connections.
- Black wires should be connected with other black wires, white with white, and green or copper with their counterparts accordingly.
Using wire nuts
- Twist wire nuts securely over connected pairs of wires to ensure stable connections.
- Check for any loose ends or exposed conductors that could lead to electrical hazards.
Ensuring proper electrical connections
- Verify all connections are tight and insulated properly within the junction box.
- Test each connection by gently tugging on individual wires to confirm they are firmly attached.
Installing the Flood Light
Attaching the Flood Light
Mounting the light
- Securely position the LED Flood Light onto the mounted junction box using appropriate mounting hardware to ensure stability and durability.
- Align the light fixture with precision to optimize its illumination range and effectiveness.
Securing with screws
- Utilize screws provided with the LED Flood Light to fasten it securely in place on the junction box.
- Ensure each screw is tightened adequately to prevent any potential movement or instability of the floodlight.
Testing the Installation
Turning on the power
- Activate the power source to test the functionality of your newly installed LED Flood Light.
- Verify that the floodlight turns on smoothly without any flickering or interruptions, indicating a successful installation process.
Checking for functionality
- Assess the brightness and coverage of light emitted by the LED Flood Light to confirm its optimal performance.
- Inspect surrounding areas for proper illumination, ensuring no dark spots or malfunctions are present in your lighting setup.
Maintain a clear understanding of the installation process to ensure a safe and effective outcome. Prioritize safety by switching off the main power supply before proceeding with any electrical work. Remember, seeking professional assistance from a licensed electrician is always a wise choice for intricate tasks. Your commitment to safety reflects your dedication to a well-executed project. Any questions or feedback on your floodlight installation journey are welcomed as we value your engagement in creating a secure home environment.
Post time: Jun-25-2024